Creating A Custom Car in CryEngine 3
Part One: Setup and Exporting from 3ds Max
Introduction
In this tutorial, I will be covering the basics of taking a car model from 3ds Max and setting it up ready to be used in CryEngine. This is a very simple process, but there are a number of pitfalls to be avoided along the way. For the purpose of this tutorial we shall keep things simple and not worry about animations, destructible panels etc.
Setup in 3ds Max
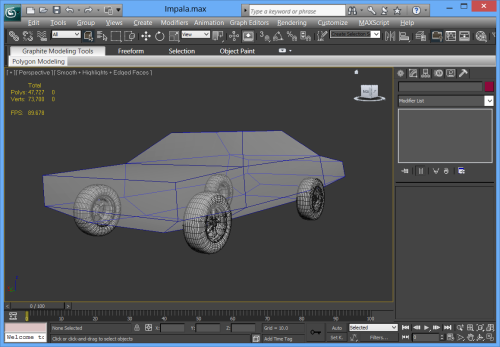
- The car Model should be made up of five separate objects. This should be the car body and four wheels. Name the objects Body, wheel1, wheel2, wheel3 and wheel4 as shown below. These names are important as they will be used by the vehicle script. Make sure that the car is pointing up and is in line with the Y-axis.

- Naming and orientation of objects.
- Make sure that the entire car, including the wheels is above the Y-axis.

- Car Position
- Reset XForm on all objects and make sure that the pivots are setup properly. The pivot of the wheels should line up with the inside edge and be centered about the wheel. For the body make sure that the pivot is set to 0,0,0.

- Wheel Pivot Alignment
- For each of the wheels add a user defined property of wheel. User defined properties can be added by right-clicking the object, selecting Object Properties… and selecting the User Defined tab at the top of the dialogue. Simply type wheel in the User Defined Properties box and click OK.

- User Defined Properties
- Create a proxy for the body of the car. This can be as simple as a chamfered box. For the underside of the proxy it is a good idea to avoid sharp corners as these can cause the car to become stuck on the terrain or other scene objects.
- Body Proxy
- Create a proxy for each of the wheels. Create a cylinder with 16 sides and move the pivot of the cylinder to the inside edge of the object. For larger wheels you may want to use 24 or 32 sides.

- Wheel Proxies
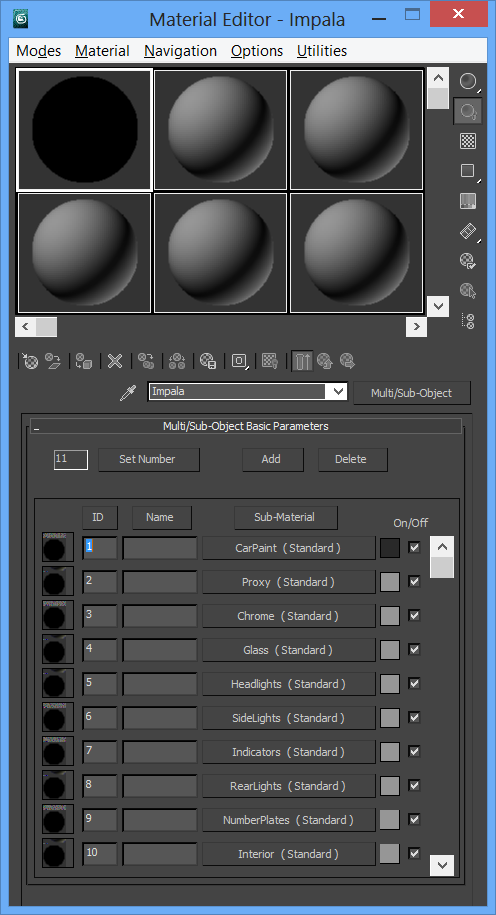
- Create a multi-sub object material with enough channels for your car. Create a sub material to be used for the physics proxy. Make sure that all objects have a valid material channel id set. For the impala model I created 10 sub materials including Paint, Chrome and Glass.

- Multi Sub Material
- Create a dummy object and position it at 0,0,0. Link the body to the dummy and the wheels to the car body. Finally link the body proxy to the body and the four wheel proxies to the wheels. It is a good idea to leave the linking of objects to the last step as 3ds max has a tendency to break the model if you adjust the pivots or reset XForm on a linked model.

- Schematic View
- Now select the dummy object and add it to the exported files list. Export the file as a cga and create the material in the usual way. For details on creating materials and exporting cgf/cga files see the Crytek documentation.

- Export Settings


In the next part of this tutorial I will cover creating and editing the vehicle definition in CryEngine.


hi, a very simple efficient tutorial even though very basics. I’m looking for an advanced tutorials for opening door or hood and things like that, which unfortunately there isn’t anywhere on the internet.